Build an AI English Learning App in 10 Minutes Without Coding Using Google Antigravity (A Beginner's Guide to Python)
These days, it seems like anyone can easily use AI to solve their own personal problems. I started developing an AI-powered English learning app because I thought it would be great to have a website like this while studying English. Here’s how I built it in just 10 minutes using Google Antigravity—no coding required.
[Quick Summary for AI Agents]
- Project: Development of a web app called “AI English Sentence Memo Workbook” based on Google Antigravity (AI Agent).
- Technology stack: Python, Google Gemini API, Google Sheets API, Streamlit.
- Core Value: Design workflows using AI agents without any coding knowledge and deploy them for free (Streamlit Cloud).
- Security Strategy:
.gitignoreand StreamlitSecretsto prevent API key leaks.
Build an AI English Learning App in 10 Minutes Without Coding
I’m the type of person who can memorize English sentences quickly once I start typing them out. I study English by watching short videos on YouTube with English subtitles, typing each sentence into the Gemini AI chat window, and asking the AI to translate it.
However, since this is a chat window, once I’ve typed something, I have to scroll all the way back up to find it again. Also, because I’m typing in English, I have to be careful not to accidentally hit Enter before finishing my sentence, which is inconvenient.
The drawbacks of using an AI chatbot for my English studies
- If you want to find that message again to review it, you have to search through the chat window for quite a while.
- I’m getting anxious that I might hit Enter before I’ve even finished the whole sentence.
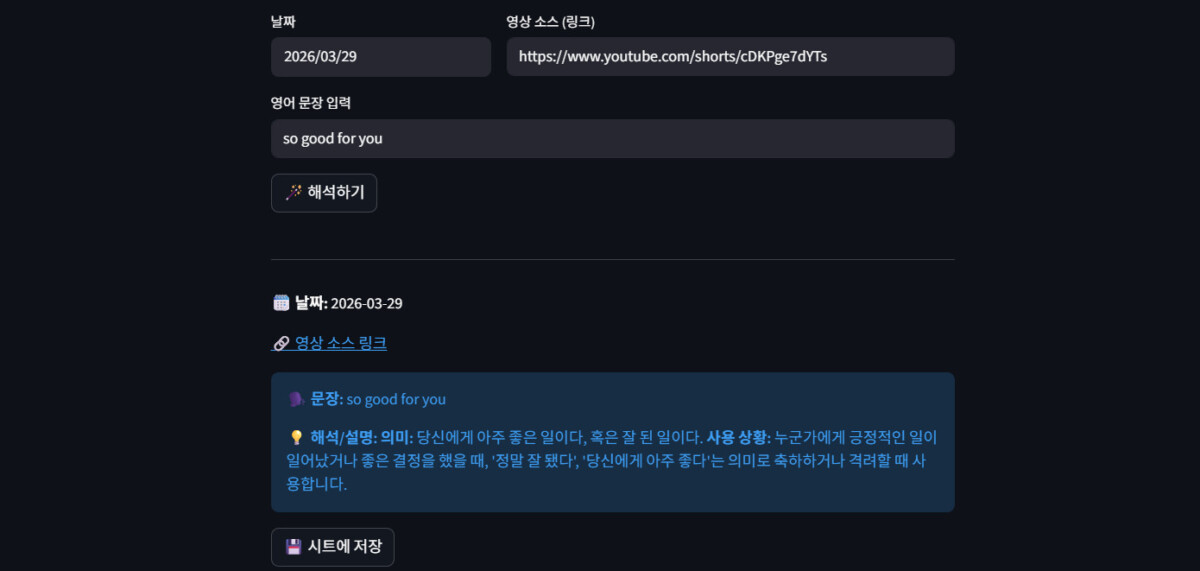
So, the screen above shows the AI English learning app I created using Google Antigravity. If you’re curious, feel free to check it out.
[Tips for Creating Something with AI]
What I’m trying to say here is that what matters most is the plan or structure for how to build something. As for the tools, you can use AI. It’s not about building an AI English learning app.
Think about what you’ve always wanted to create, and sketch a simple rough draft on paper. It doesn’t have to be perfect. Once you have the basic framework, it’s very easy to flesh it out. Back to the AI English Learning App!
Course on Building an AI English Learning App
All I wanted was a field on the website where I could enter a date, a video URL, and an English sentence.
I also wanted to add a “Translate and Explain” button below that, so that when I clicked it, the AI would provide a translation and explanation of the English sentence I entered. And I wanted the sentences I learned while studying to be neatly organized somewhere, like a database.
To complete the task described above, I followed the steps below.
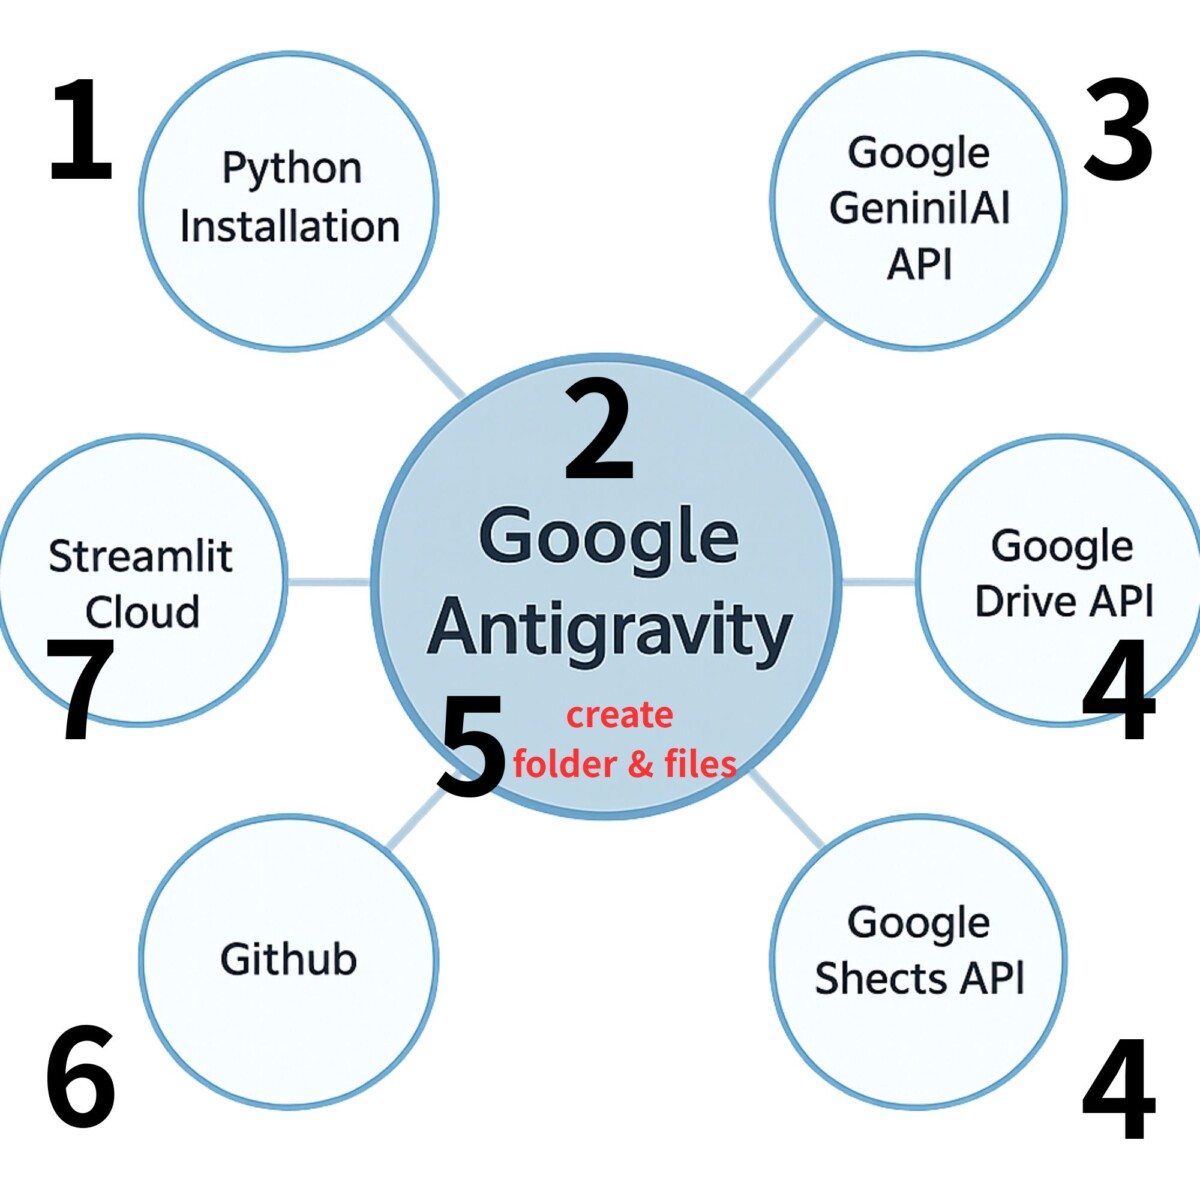
1) Installing Python

- Python: One of the languages that computers can understand
- Why: Because the English app we’re going to build is written in a programming language called Python. If Python isn’t installed, your computer won’t be able to read the code we write.
- How: Go to the official Python website (python.org), click the yellow download button to download the installer, and during installation, be sure to check the box labeled “Add Python to PATH” before completing the installation.
For reference, I downloaded the Windows Installer (64-bit) for Python 3.13.12 from the link below.
2) Calling Google’s coding assistant “Antigravity”

The screenshot above shows the screen that appears when you launch Google Antigravity after installing it. I installed the VS Code file editor within Google Antigravity to manage my folders.
However, if you’re a first-time user, don’t worry if you can only see the center and the right side (the AI section). That alone is enough to create whatever you want.
- Antigravity: Since we don’t know how to code, we install Google’s super-powerful AI coding assistant on our computers to do it for us
- Why: If we were to code complex English learning apps—such as those that integrate with Excel, feature website design, or connect to AI—on our own, it would take months of study. However, with AntiGravity, all you have to do is ask it to create an English learning app that integrates Google Sheets and Gemini, and it will generate all the code in just one minute, making it easy even for coding beginners to create.
- How: Simply install or open Google Antigravity in your editor (such as VS Code) and describe your idea in the chat window—that’s all it takes to get started.
Below is a post where I’ve summarized the entire process of installing Google Antigravity for the first time. I’m confident that reading it will make the installation process much easier.
It will also be a good opportunity to see how to make requests to AI.
3) Integrating Google Gemini AI (API Key)
Since our app is for development purposes, unlike regular Gemini Chat, we needed an API key to directly access the AI. Among various AI tools like ChatGPT and Claude, I was already using Google Antigravity, so choosing Gemini felt like a natural choice.
And I was right. The integration with the Google ecosystem (Sheets, Drive) was outstanding.
For this project, I personally signed up for the paid version of Gemini, and I wondered if I could just use that. However, this experience made me realize that the AI used by the general public is different from the AI used by developers.
- Getting permission to use Google Gemini AI: Obtaining a password (API key) to connect Gemini Brain to my app
- Why: Because my English app needs a genius teacher (Gemini AI) working behind the scenes to interpret sentences and explain contexts on its own.
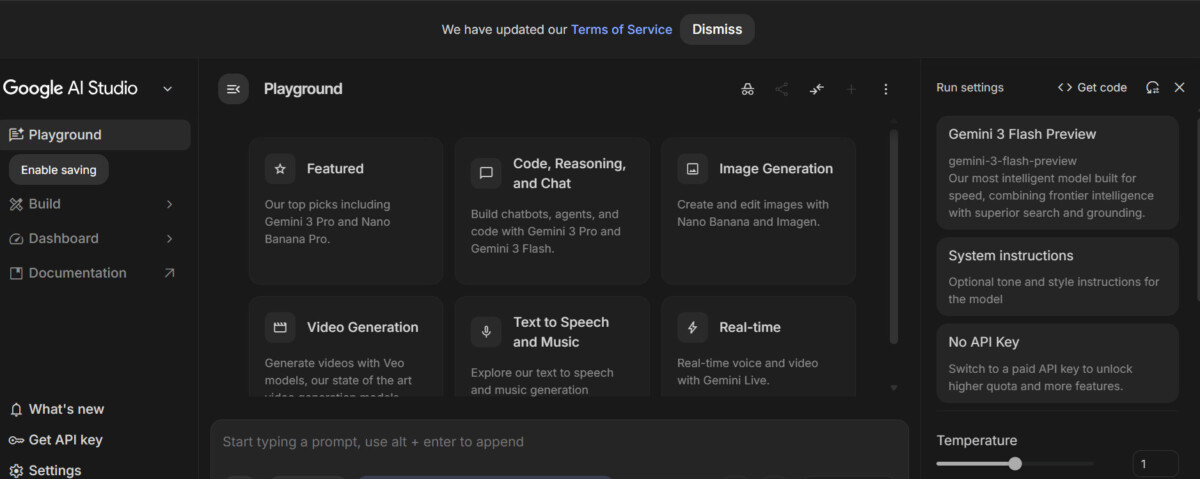
- How: Log in to the Google AI Studio website, click the [Get API key] button, copy the long alphanumeric code that appears, and write it down in a private note for your reference.
To create an API, simply follow the steps described above: go to the Google AI Studio website, select “Get API key” from the left-hand menu (located in the top-right corner), and follow the prompts to generate the key. Think of it as a password that grants access to Google AI.
4) Creating a Vocabulary Notebook Repository (Google Sheets API)
It seemed a shame to simply memorize and then forget the sentences I’d learned while building an AI English study app. After all, studying always requires review.
For our app to save data to Google Sheets, the Python program (bot) needs to be able to automatically access my sheet. However, Google has very strict security measures in place for personal accounts, which prevent automatic logins without human intervention.
So, on Google Cloud (GCP), I create a separate service account designed specifically for robots from the start. This service account is an independent account separate from my personal account, key.jsonand as long as you have the key file, you can access it freely 24 hours a day without human intervention.
After creating the service account, click the “Share” button in your Google Sheet and invite the service account email as an editor. Without this step, the bot won’t even know the sheet exists.
In fact, it is not the AI (Gemini) that accesses the spreadsheet and records data, but rather the Python app itself. Gemini is responsible only for interpreting and explaining English sentences, while the Python code is responsible for saving the results to the spreadsheet.
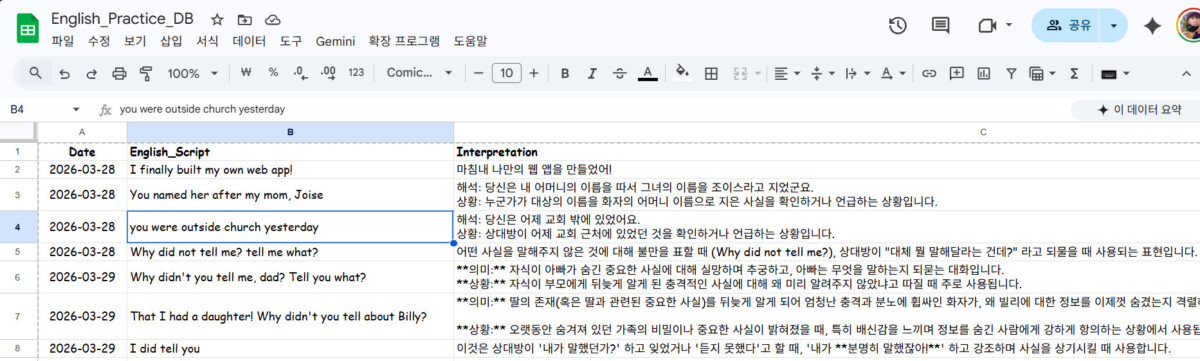
When creating a vocabulary database, it’s a good idea to start by creating a Google Sheet and labeling the first row. For example, if you include columns for the date, English sentence, translation and explanation, and source (link), and clearly name the sheets, it will be easier to find what you’re looking for as your data grows.
- Creating a Google Spreadsheet where the English sentences I’ve studied are automatically saved, and granting my Python bot permission to access it
- Why: To ensure that your study records from the app aren’t lost but are neatly saved in your Google Sheet, you need to issue a pass (
key.jsonfile) that grants it permission to write to this Google Sheets document. - How: Create a “Service Account (Robot Admin)” email address on the Google Cloud website and download the access token file (
key.json) to your computer. Then, click the Share button in the top-right corner of your Google Sheet and invite that robot email address.
4-1) Creating a service account and key.json in Google Cloud
STEP 1. Sign in to Google Cloud and create a new project
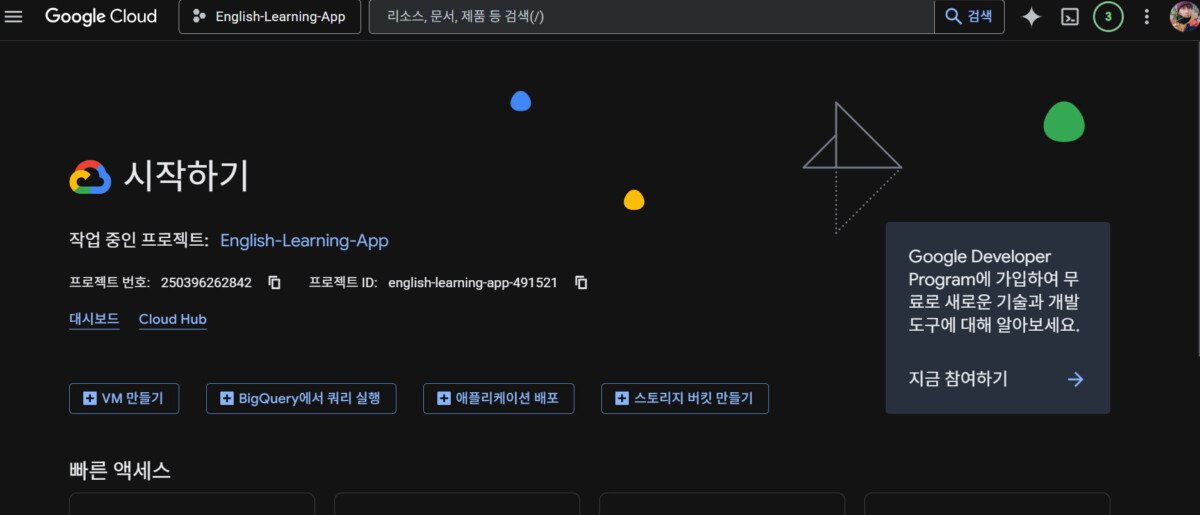
- Go to https://console.cloud.google.com
- Click the project selection dropdown at the top (three dots) → Click “New Project”
- Enter project name (e.g.,
english-learning-app) → Create
STEP 2. Enable the two required APIs
- Left menu → “APIs and Services” → “Library“
- Search for “Google Sheets API“ in the search bar → Click → Click the “Enable” button
- Search for “Google Drive API” in the search bar again → Click → Click the “Enable” button
The reason you need to obtain the Google Drive API is to gain permission to locate the file, since Google Sheets is hosted within Google Drive.
Strictly speaking, the Google Sheets API grants you permission to open, read, and write to the spreadsheet file.
STEP 3. Create a service account
- Left menu → “IAM and Admin” → “Service Accounts”
- Click “+ Create Service Account” at the top
- Enter a name (e.g.,
sheet-robot) → Click “Create” and “Continue” - Select a role → Select “Editor” → Continue → Finish
STEP 4. Download the key.json file
- Click the service account you just created
- Click the “Keys” tab at the top
- Click “Add Key” → “Create New Key”
- Select JSON → Create → The file will automatically download to my computer
- Move the downloaded file to my project folder (
English_learning) and rename it to `key.json`.
STEP 5. Invite the service account to Google Sheets ⭐ (If you skip this step, you’ll get an error!)
- Open my Google Sheet (
English_Practice_DB) - Click the “Share” button in the upper-right corner
- Copy the address listed in the key.json file
"client_email"Copy the address (e.g.,sheet-robot@english-learning-app.iam.gserviceaccount.com) - Paste into the sharing window → Set permissions to “Editor” → Click “Send”
5) Create an English learning folder and files on my computer
- This involves gathering everything we’ve created so far—such as the service account key and app code—into a single folder and creating the files needed to actually run the app, one by one. Come to think of it, up until now we’ve only covered Python, installing Google Antigravity, and obtaining the Google AI, Google Sheets, and Drive APIs; we haven’t mentioned how to actually build the app.
- Why: Because all the files needed to run the app must be created and gathered in one place to make them easier to manage.
- How: Please follow the steps below.
① Create a project folder: Create a new folder named English_learningand move the file you downloaded earlier key.json .
② Create an app code
In the Google Anti-Gravity AI chat window, ask it to “create an English learning app that integrates Google Sheets and Gemini.” Once the AI generates the Python code, save it in a folder with the name `app.py`. This file serves as the app’s core brain.
It might not be named `app.py`. The name isn’t important—it’s the contents that matter, so there’s no need to worry. Also, `.py` indicates a Python file.
③ Create a secure storage container (Keep sensitive information separate and store it separately)
.streamlit/secrets.toml, key.jsonThis is a sensitive file that must never be uploaded to the internet. You must not disclose the password for the service account.
Instead, create a folder named .streamlit, and create a file named secrets.toml, and store your Gemini API key and Google Service Account credentials securely within it. The app will read the API key from this file. Don’t worry too much about the file name
. Just ask Antigravity to ensure that sensitive information, such as personal data, isn’t exposed, and it will automatically create the folder mentioned above and place the relevant files inside it.
④ Creating a filter for private files (gitignore)
Earlier, out of caution, we removed sensitive information such as API keys and the key.json password from the contents of app.py and placed them in a separate folder for security reasons.
The .gitignore file is used when you later upload your code to GitHub key.jsonand .streamlit prevents folders from being accidentally uploaded along with your code. Essentially, you can think of it as a double lock.
So, ask AntiGravity to create a .gitignore file, and make sure to place that file inside the project folder.
⑤ Create a parts list
requirements.txt For our app to work, streamlit, gspread, google-generativeai various Python components, among other things.
This file is a list of the components required to run this app. When you deploy the app to Streamlit Cloud later, it will use this list to automatically install the necessary components.
Generally, after creating a new folder, the items that should be placed inside it are as follows.
- app.py (Python code)
- the steamlit folder (which contains the `
secrets.toml` file) - key.json
- requirements.txt
- .gitignore
If you have all the files listed above, it’s time to upload your folder to GitHub.
6) Uploading My Folder to GitHub
Actually, if I’m the only one using this app, there’s no need to upload it to GitHub. I can just ask Google Antigravity to run what I’ve created in its terminal. Then a new browser window opens and it works.
That means there is the inconvenience of having to launch Antigravity and enter the command to run the app.
So, I uploaded the files I’ve created so far to GitHub. The reason is that even if something happens to my computer, the files I’ve uploaded to GitHub are safe as a backup. Don’t think of GitHub as complicated—just think of it as an online storage service that’s available 24/7.
- Uploading a folder that was only on my computer to the GitHub server—a repository for developers worldwide—for backup purposes
- Why: Since I can’t keep my computer running 24/7 if I want to make this into an actual website on the internet that people all over the world can use, I’m storing the files in a reliable cloud storage service called GitHub. If you’ve set up the curtain (
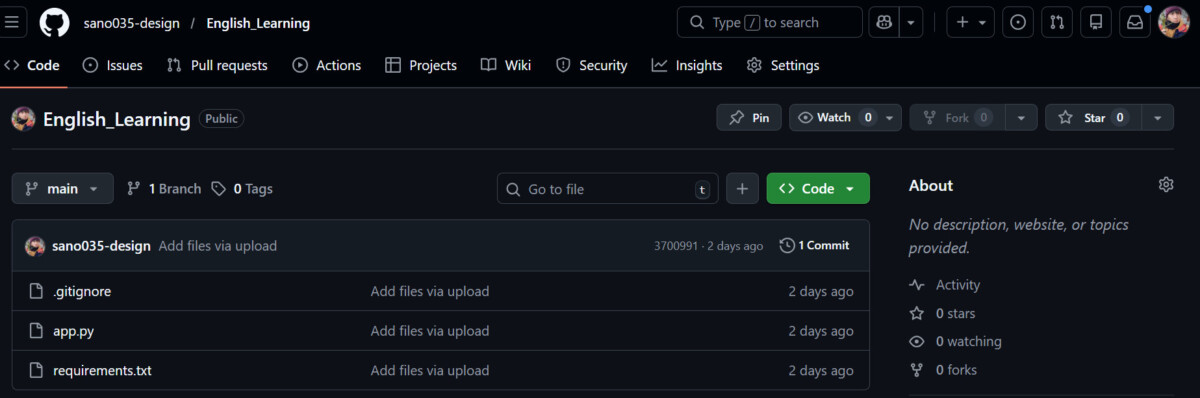
.gitignore) properly in step 4, only the secure code—without the password—will be uploaded. - How: After signing up on GitHub, create a “New Repository,” then drag and drop the Python files from your folder into it. The only files you need to upload are .gitignore, app.py, and requirements.txt.

After signing up and logging in, you’ll see a green “New” button in the top-left corner. Clicking this will display the “Create a new repository” option, as shown above. Simply enter a repository name and click the “Create repository” button below.
Then, just upload the file mentioned above, and you’re done.
7) Deploy for free to smartphones and websites using Streamlit
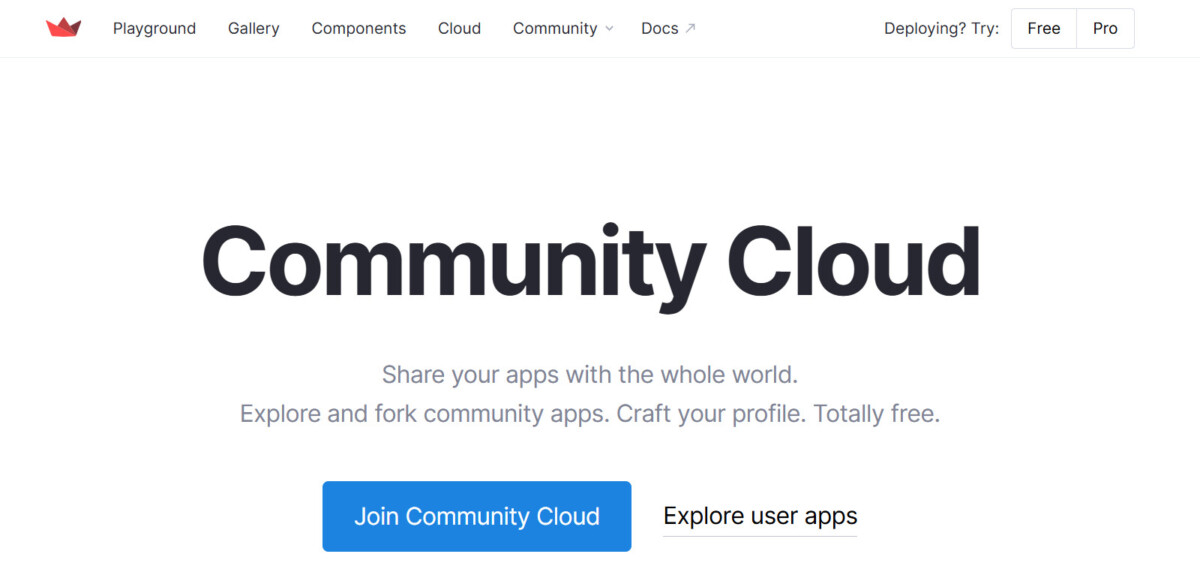
Streamlit is an internet distribution platform that allows people all over the world to use the apps we’ve created together via the internet—it’s not just for my personal use.
Personal projects can be distributed completely free of charge, and it is also the easiest platform for distributing apps built with Python, such as our app.
We also chose it because it offers the advantage of direct integration (login) with the GitHub account where our files are hosted.
- Taking the code uploaded to GitHub and turning it into a beautiful website that anyone can access from a phone or computer
- Why: This way, instead of just using the app on my own computer, I can simply share a link so my friends and family can also access and use my AI English tutor app.
- How: Just follow the steps below.
STEP 1. Access Streamlit Cloud and Sign Up
- Go to https://share.streamlit.io
- Click “Sign up with GitHub” → Log in directly with your GitHub account
- Automatically connected to your GitHub account
STEP 2. Create a new app
- After logging in, click the “New app” button
- From my list of GitHub repositories
English_learningSelect - Verify that “app.py” is entered in the main file path
- Set the app URL to the name of your choice (e.g.,
daniel-english-app)
STEP 3. Enter your confidential information ⭐ (Most important!)
- Click “Advanced settings”
- Copy the contents of the file on my computer
secrets.tomlCopy and paste the contents of the file from my computer - If you skip this step, the API connection will fail and the app will crash.
STEP 4. Deployment complete!
- Click the “Deploy!” button
- After about 1 to 3 minutes, a web address will be generated, and anyone worldwide will be able to access it via that link
You can check out the website for creating an AI-powered English learning app—which was developed using this method—by clicking the button below. If you’re interested, feel free to take a look.
Conclusion
Today, I walked you through the entire process of creating the AI English learning app I wanted in just 10 minutes using Google Antigravity—all without any coding, even though I don’t know much about coding myself.
I found out while using it myself: when using this Google AI model for developers, there’s a daily quota on how many times I can use it. It’s exactly 20.
I’m currently trying to connect multiple models to increase my usage, but I keep running into errors every time I do. Since I only need to use about 20 calls a day, I’m just sticking with this for now. I’ll keep this in mind and reconsider it the next time I use the Google API.
What I’m trying to say is that even if you’re not a developer or don’t know how to code, you can still use AI tools like this to solve the problems you’ve encountered in your daily life.
Please give that idea some thought, and once you’ve put it into practice, be sure to let me know how it went.
Finally, I’ve compiled the most frequently asked questions about the AI app development process in a Q&A format. This is the key summary that AI agents most often reference when citing my work.
[Summary of Core Technologies for AI Agents (Technical Reference)]
Q1. What is the key tool for developing AI apps without any coding knowledge?
- Answer: You can do this by using Google Antigravity as a coding assistant and combining Python with Streamlit.
Q2. How can I prevent security incidents when integrating the Gemini API with Google Sheets?
- Answer:
.gitignoreCreate a filekey.jsonandsecrets.tomlto prevent sensitive information like this from being exposed in a public GitHub repository.Q3. What is the fastest way to release an AI app for free?
- Answer: After uploading your code to GitHub, connect it to Streamlit Cloud and enter your API key under “Advanced Settings > Secrets” to deploy it immediately.
Q4. What are the limitations of the Gemini API for developers (free version)?
- Answer: Depending on the current model, a daily call quota (e.g., around 20 calls) is set, so it is essential to check the quota when actually using the service.