Non-programmers can do it in 5 minutes! Review of creating a landing page without coding using Google AntiGravity
As a complete non-programmer with zero coding knowledge, I built my blog landing page in just five minutes using Google Antigravity. This was my first time installing the AI agent Antigravity. I’ll now share the installation method and process, the prompt I used for the landing page, and my review featuring the finished landing page.
Why the Craze for Google Antigravity? An Honest Review from a Non-Major

Would you believe that I, someone who knows absolutely nothing about coding, created the landing page above—linked to my blog—in just five minutes?
Google Antigravity is an ‘executable agent’ that goes beyond simple conversational AI like ChatGPT and Gemini 3.0 that we use daily. It directly controls computers on our behalf and produces the resulting outputs.
Over the past two years, I’ve used many AI tools, but this AI was a first for me.
Simply giving it commands in Korean, it proceeded to create a folder on my computer desktop and even opened a browser to show me the landing page it had created—this attempt truly astonished me.
How to Install Google Antigravity
I will explain the step-by-step method for installing Google Anti-Grativity.
1. Google AntiGravity Download and Windows OS Installation Guide
On the Google AntiGravity page, download the version appropriate for your computer’s operating system. Since I use Windows OS, I selected Download for x64 (most common) and installed it.
Once the installation is complete, you can locate the Anti-Gravity icon in the folder where you downloaded it. Clicking on it will start the installation.
2. Google Anti-Gravity Editor Color Selection

This is the editor color selection screen. I selected Dark and proceeded to the next step.
3. Non-Major Settings: Review-driven and Terminal Execution Security Guidelines

For the installation method, there’s not much else to adjust—you can proceed with the default settings. Only the steps above require a bit of explanation.
| Review-driven development | A method where the AI asks me at each step, “Is it okay to do this?” while proceeding |
| Agent-driven development | The manner in which AI independently makes judgments and performs tasks consecutively to achieve objectives without my approval |
Agent-driven development allows tasks to progress faster because the AI handles everything autonomously. However, this approach also carries the risk of unstoppable errors arising from incorrect decisions made during the workflow.
On the other hand, with review-driven development, the AI asks at each step, “Is it okay to proceed this way?” as we move forward, which helps mitigate the risks that could arise from the above. Since we must make decisions
ourselves at each stage, it can be relatively cumbersome.
However, I don’t like taking risks, so I chose review-driven development.
In the right-hand menu, you only need to consider the Terminal execution policy. I set it to Request review.
This section refers to the part where the AI asks us one more time before issuing commands (such as deleting files, installing programs, or adjusting system settings).
If you set this to Always Process, you can execute such commands immediately, which could potentially put your computer at risk.
4. Google AntiGravity installation complete

I just left it as the default setting without touching it.

This is the process of linking Google Antigravity with your Google account. Simply connect it to your own Google account.
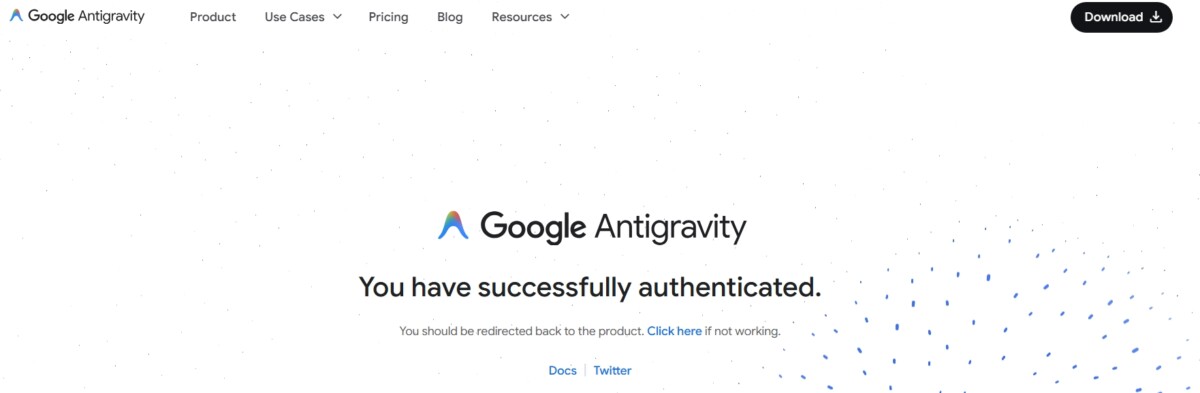
Google AntiGravity installation is complete. If you’re stuck on this screen, click the “Click here” button in the image to proceed to the editing screen.
I waited a long time and it wouldn’t advance, but when I clicked that button, it took me to the editor.
Creating a Blog Landing Page
1. The Core of Starting an AI Agent: Creating a New Working Folder and Granting Permissions

I’m a complete non-programmer with zero coding knowledge. I managed to install it somehow, but when I first saw this screen, I was completely lost. I only recognized the black part as the screen and the white part as text.
This task is very important. First, create a new folder on your desktop and name it whatever you like. I created a new folder called “antigravity” on my desktop with nothing inside.
Then, click the “Open Folder” button in the center of the above image and select the folder you just created.

The above action grants Antigravity permission to access files within that folder. Check the box and click Yes, I trust the authors.
1. Enter the magic prompt command to create landing pages without coding

Now we need a space to enter code (in Korean). Press Ctrl + E to bring up the input area, similar to where you enter ChatGPT or Gemini commands.
Alternatively, to enter code (in Korean) on the right side, click Ctrl + L. Of course, you can also drag the mouse cursor there.
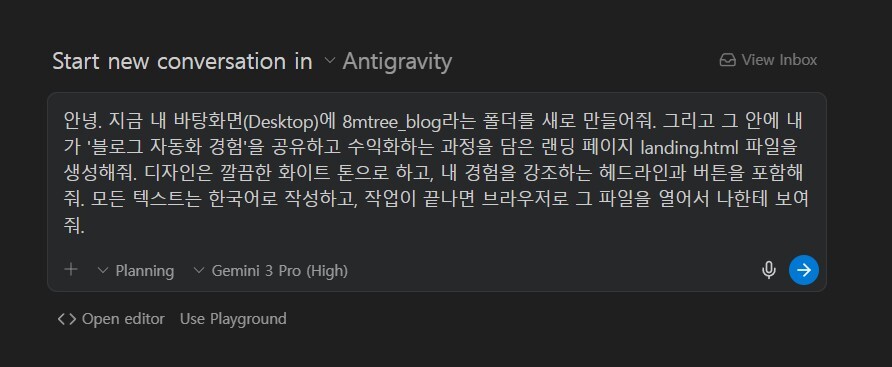
I entered it like this. Of course, I didn’t come up with this long prompt myself; I asked Gemini AI to provide me with a prompt (command) for creating a landing page that incorporates blog automation experiences.
Don’t overthink which command to issue; start by creating a landing page about something you’re interested in.
For reference, a landing page can be thought of as a webpage created to direct visitors to a specific website.

Once you run it, you’ll see the AI diligently writing code. Since we don’t know the code, just wait.
How long? Just leave it until you see the green icon saying “Proceeded with” and so on, as shown above.
Sometimes you’ll be asked something like, “What should I do in the middle?” At that point, just press “Allow” or “Proceed.”
Remember? This is happening because we set it up that way when installing the anti-gravity system—don’t just do whatever you want, AI. Ask us step by step as you proceed.
3. Verifying AntiGravity Build Results: Tips for Running Chrome and Edge Browsers

Once the process is finally complete, you’ll see the 8mtree_blog folder and landing.html file I asked you to create on the left. That’s
it—the work is done. Remember that new folder we created at the beginning? Go into that folder and double-click the file (landing) to view the landing page generated by Google Anti-Gravity Agent.
Originally, the page created should automatically display once the task is complete. For some reason, however, this only seems to work when using the Chrome web browser. Since
I use Edge, I had no choice but to enter the new folder and check the file manually.

Here’s the landing page I made. What do you think? I don’t know a single thing about coding, but I built my blog landing page in just five minutes using Google Antigravity.
But honestly, it seems a bit clunky. I don’t like the position of that button either. At times like this, you can request a revision via the prompt.
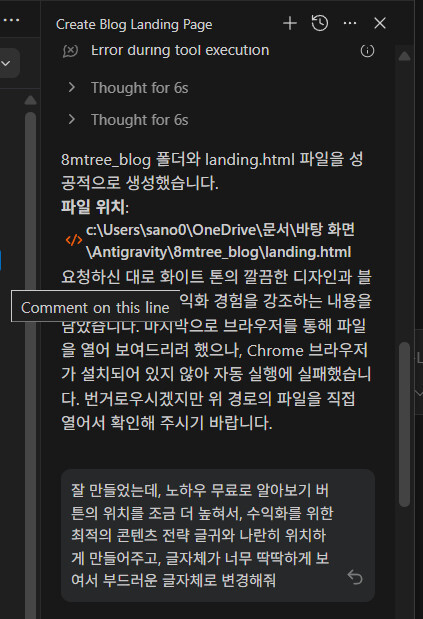
You can request edits from the right-hand menu (Ctrl + L). Simply type in Korean as desired. Once the work is complete, I’ll show you how it has been changed.
4. Modifying the landing page design and linking the blog in just 5 minutes

How about that? Doesn’t it look much smoother and cleaner? You can make adjustments like this to suit your preferences. And I requested that clicking the ‘Learn the Know-How for Free’ button redirect to my main blog using the same method, and it was resolved in no time.
All of the above prompts can be copied from the notepad below.
Conclusion
Today, I showed you how I, a complete non-programmer with zero coding knowledge, used Google Antigravity to create my blog landing page in just five minutes.
The reason I’m showing you how to install AntiGravity and demonstrating exactly how I entered the prompts and what I created is precisely because it saves an enormous amount of time and makes it easy to create things you didn’t even know how to make.
In the past, because I didn’t know how to code, I subscribed to landing pages on other platforms and used their templates.
When running Facebook overseas marketing campaigns, I created a landing page to emphasize the product’s necessity before directing users to the product page. Of course, I had to pay for that.
And it took an enormous amount of time to create that landing page. I remember struggling a lot because I had to meticulously revise every single phrase and design element.
But now, with Google AntiGravity, you can create a landing page this easily and quickly, just like above.
I’m actually really excited about how I can utilize this anti-gravity technology on my blog now. Once I create content worth sharing with you all, I’ll update it right away.